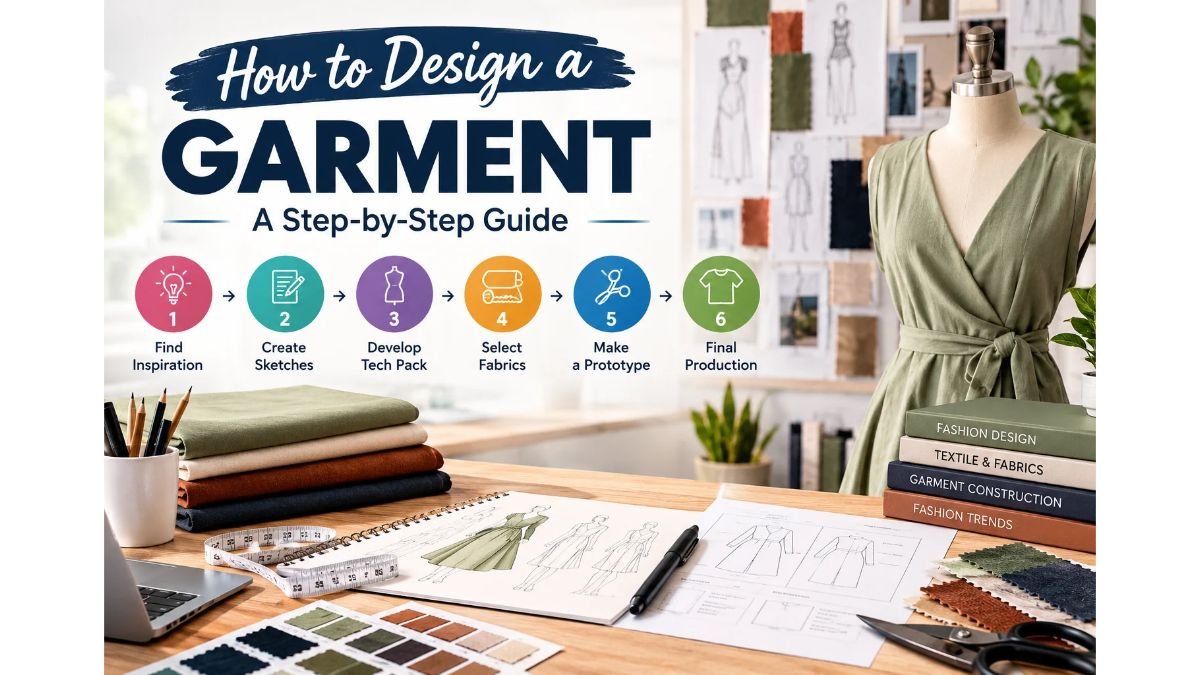
How to Design a Garment: A Complete Step-by-Step Guide
Learning how to design a garment involves more than drawing an attractive outfit. A successful garment combines creativity, fabric selection, fit, construction, functionality, and production planning. Whether you want to create your first clothing piece, launch a fashion brand, or develop a custom collection, understanding the complete design process can help turn your ideas into wearable products.
Garment design starts with an idea and develops through research, sketching, material selection, pattern making, sampling, fitting, and final production. Each stage helps ensure that the finished clothing matches your vision and meets your target customer’s needs.
This guide explains how to design fashion clothes step by step, from your first inspiration to preparing a garment for manufacturing. You will also learn how to choose fabrics, create technical specifications, avoid common mistakes, and work with a clothing manufacturer.
What Does It Mean to Design a Garment?
Garment design is the process of planning and developing clothing before it is manufactured. It includes the garment’s appearance, structure, measurements, materials, fit, finishing, and practical use.
A designer must consider both the creative and technical sides of clothing. A beautiful sketch may look impressive, but it must also be possible to construct the garment using suitable materials and production methods.
For example, designing a hoodie involves more than choosing its color and adding a logo. You must consider fabric weight, body measurements, sleeve shape, hood construction, ribbed cuffs, pocket placement, stitching, and branding.
The same principles apply to T-shirts, jackets, jeans, tracksuits, dresses, activewear, and other clothing categories.
Good garment design balances three important elements:
- Appearance: The garment should reflect the desired style, colors, and visual identity.
- Function: It should provide appropriate comfort, movement, and usability.
- Manufacturing: Its materials and construction should be suitable for production.
Understanding these elements helps you create clothing that looks good, works well, and can be manufactured consistently.
Step 1: Define Your Garment Idea
The first step in learning how to design a garment is deciding what you want to create. Start with a clear concept instead of trying to develop every detail at once.
Think about the garment’s purpose, target audience, and overall style. A performance T-shirt requires different design decisions from an oversized streetwear T-shirt. Similarly, children’s clothing needs different fit and construction considerations from adult fashion.
Ask yourself these questions before beginning:
- What type of garment do I want to design?
- Who will wear it?
- What purpose will it serve?
- Which styles or trends inspire the design?
- What makes this garment different from existing products?
- What price range and quality level do I want to achieve?
Your answers will guide later decisions about fabrics, measurements, construction, and decoration.
Choose a Specific Design Direction
A focused design direction makes the development process easier. You might choose minimalist fashion, streetwear, luxury casualwear, sportswear, workwear, or sustainable clothing.
For example, a streetwear collection may use oversized silhouettes, heavyweight cotton, dropped shoulders, and bold graphics. An activewear collection may require stretch fabrics, moisture management, flexible seams, and a closer fit.
Create a short design brief describing the concept. Include the intended customer, garment type, preferred style, main colors, functional requirements, and approximate retail price.
This brief becomes your reference throughout the design process.
Step 2: Research Fashion Trends and Your Target Audience
Fashion research helps you understand what customers want and how your design can fit into the market. It also helps you identify opportunities without simply copying another brand.
Study clothing brands that serve a similar audience. Examine their silhouettes, fabrics, color palettes, garment details, pricing, and product presentation.
You can gather inspiration from fashion magazines, runway collections, retail websites, street style, fabric swatches, and design platforms.
However, inspiration should support your own creative direction. Avoid copying another designer’s complete product, distinctive artwork, logo, or protected design.
Create a Mood Board
A mood board is a collection of visual references that communicate your design direction. It can include:
- Clothing silhouettes and garment details
- Color combinations
- Fabric textures
- Prints, patterns, and graphics
- Stitching and finishing references
- Photography and lifestyle inspiration
Arrange the references around one clear theme. For example, a neutral streetwear mood board might include oversized hoodies, charcoal joggers, cream T-shirts, heavyweight cotton textures, and simple embroidered branding.
A mood board helps you maintain visual consistency when designing multiple garments for the same collection.
Understand Your Customer
Your target customer affects almost every design decision. Consider their age range, lifestyle, preferences, climate, budget, and typical clothing needs.
Customers purchasing gym clothing may prioritize flexibility, breathability, and sweat management. Customers purchasing premium casualwear may focus more on fabric feel, fit, durability, and finishing.
When you understand the customer, you can create designs with a clear purpose rather than choosing features randomly.
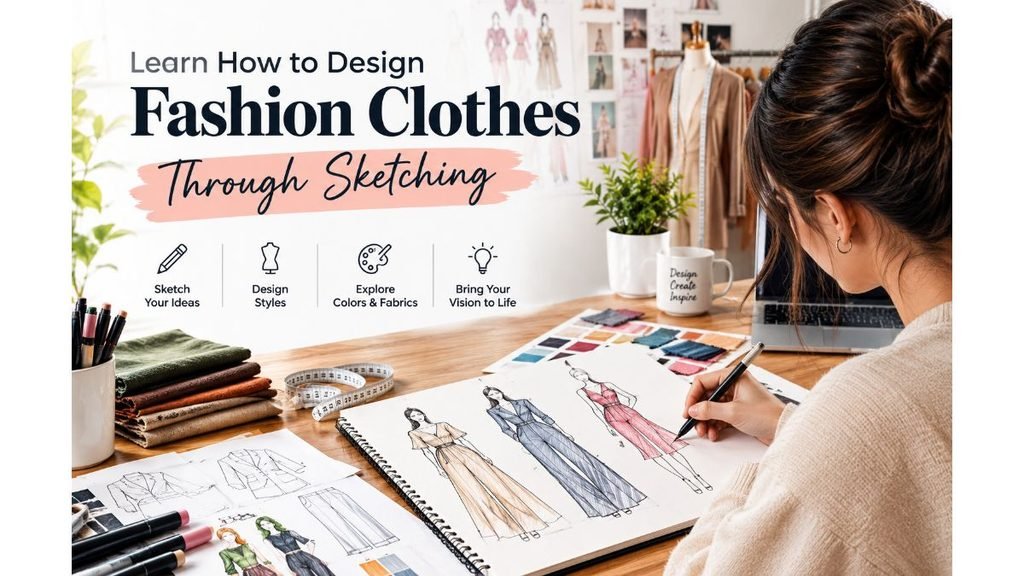
Step 3: Learn How to Design Fashion Clothes Through Sketching
Sketching allows you to explore your ideas before investing time and money in samples. You do not need to be an expert illustrator to begin. Simple drawings can communicate the essential shape and details of a garment.
Start by drawing the front view. Add the back view when the garment has important rear details, such as pockets, seams, graphics, or special panel construction.
Focus on the garment’s overall silhouette first. Then add smaller details.
For example, a hoodie sketch may include:
- Oversized body shape
- Dropped shoulder seams
- Hood and drawstrings
- Ribbed cuffs and hem
- Kangaroo pocket
- Chest embroidery or printed artwork
Keep your sketches clear enough for another person to understand the intended design.
Explore Digital Fashion Design Tools
Digital design software can help you refine sketches, test colors, and prepare professional-looking design presentations. Depending on your needs, you can use illustration software, vector design programs, or specialized fashion design applications.
Digital tools are useful for testing several variations without redrawing the garment each time.
You can change colors, move graphics, adjust panel shapes, and compare different design options. Some advanced tools also support three-dimensional garment visualization.
However, a digital illustration does not replace a physical sample. Fabric behavior, actual fit, stitching, and construction still need to be evaluated during product development.
Step 4: Select the Right Fabric
Fabric selection is one of the most important stages of garment design. The material affects appearance, comfort, fit, durability, and manufacturing cost.
Choose fabric based on the garment’s purpose rather than appearance alone.
For example, heavyweight cotton may suit structured streetwear, while lightweight moisture-wicking polyester may be appropriate for performance clothing.
Common fabric options include:
| Fabric | Common applications | Important considerations |
|---|---|---|
| Cotton jersey | T-shirts and casual tops | Softness, breathability, shrinkage |
| French terry | Hoodies and sweatshirts | Texture, weight, comfort |
| Brushed fleece | Warm hoodies and tracksuits | Warmth, softness, thickness |
| Polyester interlock | Sportswear and performance tops | Durability, surface, moisture management |
| Stretch blends | Leggings and fitted activewear | Recovery, stretch, opacity |
| Denim | Jeans and jackets | Weight, wash, structure |
| Twill | Trousers, uniforms, and workwear | Durability, texture, stiffness |
Understand GSM
GSM means grams per square meter. It measures fabric weight and helps designers compare materials.
A higher GSM generally indicates a heavier fabric, while a lower GSM generally indicates a lighter fabric. However, GSM alone does not determine quality or suitability.
A lightweight fabric may be ideal for summer clothing. A heavier fabric may work better for structured hoodies or winter garments.
Consider these factors when selecting fabric:
- Fiber composition
- Fabric weight and thickness
- Stretch and recovery
- Surface texture
- Breathability
- Shrinkage and colorfastness
- Intended garment construction
- Decoration requirements
Request fabric swatches whenever possible. Feeling and examining the material can help you make a more informed decision before sampling.
Step 5: Choose Colors, Prints, and Garment Details
Once you have a suitable fabric direction, define the garment’s colors and visual details. These elements help establish its identity and connect it to your overall collection.
Choose a color palette that supports the target customer and intended style. A minimalist collection may use neutral colors, while a sportswear collection might feature brighter shades and contrasting panels.
Next, decide which details will appear on the garment.
These may include zippers, buttons, drawstrings, pockets, ribbing, contrast stitching, panels, embroidery, or printed graphics.
Select the Right Decoration Method
Different decoration techniques produce different results. The best choice depends on the artwork, fabric, garment use, quantity, and desired appearance.
- Screen printing: Often suitable for bold graphics and repeated designs.
- Embroidery: Adds stitched logos or artwork with a textured appearance.
- Direct-to-garment printing: Can reproduce detailed artwork on suitable fabrics.
- Sublimation: Commonly used for polyester-based performance garments.
- Heat transfer: Applies graphics using a transfer process.
- Puff printing: Creates a raised visual effect on suitable designs.
Discuss the decoration method with your manufacturer before finalizing the design. Some techniques work better on specific fabrics or garment surfaces than others.
Also decide where the branding will appear. Placement options include the chest, back, sleeve, hem, waistband, or inside neck area.
Step 6: Develop Accurate Measurements and a Size Chart
A garment needs accurate measurements to achieve the intended fit. A sketch communicates appearance, but measurements communicate physical dimensions.
Create a measurement chart appropriate for the garment type. For a T-shirt, this may include body length, chest width, shoulder width, sleeve length, and sleeve opening.
For trousers, measurements may include waist, hip, rise, inseam, outseam, and leg opening.
Define how each measurement should be taken. Consistent measurement points make sample reviews and production inspections more reliable.
Understand Fit and Ease
Fit describes how a garment sits on the body. Ease is the difference between the body’s measurements and the garment’s measurements.
A fitted garment generally uses less ease than an oversized garment. However, the appropriate amount depends on the silhouette, fabric, and intended movement.
Consider how the material behaves when worn. Stretch fabrics may require different measurements from rigid woven fabrics.
Once the base size is approved, the manufacturer can develop additional sizes through pattern grading. Grading adjusts the pattern to create a size range while maintaining the intended design proportions.
Do not assume that increasing every measurement by the same amount will produce a balanced fit across all sizes.
Step 7: Prepare a Garment Tech Pack
A tech pack is a technical document that communicates how a garment should be developed and manufactured. It reduces confusion between the designer and the production team.
A clear tech pack should contain the information needed to reproduce your design accurately.
Important sections may include:
- Front and back technical drawings
- Garment measurements and size chart
- Fabric composition and weight
- Color references
- Stitching and construction details
- Trims, buttons, zippers, and drawstrings
- Logo artwork and placement
- Print or embroidery specifications
- Labels and packaging requirements
- Tolerance requirements and revision notes
Attach reference images or fabric examples when they clarify a specific requirement.
For instance, a hoodie tech pack should specify the intended fabric, hood construction, pocket dimensions, rib details, drawstring requirements, logo placement, and measurement points.
If you are not ready to prepare a complete tech pack, start with sketches, reference images, a written brief, and available measurements. Work with a qualified product developer or manufacturer to identify missing information before sampling.
The more clearly you communicate your requirements, the easier it becomes to evaluate whether the sample matches your vision.
Step 8: Create a Pattern and Develop the First Sample
A pattern is a template used to cut fabric pieces that will be assembled into a garment. Pattern development translates the design and measurements into shapes that can be constructed.
The pattern maker considers seam allowances, garment proportions, fabric characteristics, and construction methods.
For complex garments, the process may involve several pattern adjustments before a suitable sample can be produced.
Why Sampling Matters
A sample is a physical version of your design. It helps you evaluate the actual garment instead of relying only on sketches or digital images.
During sampling, check:
- Overall fit and proportions
- Fabric weight, texture, and color
- Stitching and seam construction
- Pocket, zipper, and trim placement
- Print or embroidery quality
- Comfort and movement
- Finishing and overall appearance
Try the garment on the intended fit model or use appropriate measurements to evaluate it.
Write down every required correction. For example, the sleeves may need shortening, the chest may need additional width, or the logo may need to move slightly.
A sample may require more than one revision. That is a normal part of product development.
Step 9: Test, Refine, and Approve the Design
After receiving the sample, compare it with your original brief and technical specifications.
Do not approve a garment simply because it looks attractive. Check whether it matches the intended measurements, fabric, construction, and branding.
Where relevant, evaluate shrinkage, colorfastness, seam strength, pilling, stretch recovery, and wash performance. Testing requirements depend on the garment’s purpose and the quality standards you need.
Record the corrections clearly and request another sample if major changes are required.
Once the sample meets your expectations, approve the final specifications in writing. Keep the approved sample and updated tech pack as references for bulk production.
This step is important because even small differences in fabric, pattern, or construction can affect the finished product.
Step 10: Understand the Garment Manufacturing Process
Design and manufacturing are closely connected. A garment that is difficult or expensive to construct may need adjustments before production begins.
The typical clothing manufacturing process includes several stages.
1. Material sourcing: Fabric, trims, labels, and other components are selected according to the approved specifications.
2. Pattern preparation: Patterns and size specifications are finalized.
3. Fabric inspection and cutting: Fabric is checked for relevant defects and cut into garment components.
4. Sewing and assembly: The components are stitched together using suitable construction methods.
5. Decoration and finishing: Printing, embroidery, washing, pressing, or other specified treatments are completed.
6. Quality control: Garments are inspected against approved requirements.
7. Packaging and shipment: Products are labeled, packed, and prepared for delivery.
The exact workflow depends on the garment type, fabric, decoration, and factory capabilities.
Plan for Manufacturability
When deciding how to design fashion products, think about how the design will be produced at scale.
Unusual seams, complicated panel shapes, specialized trims, and multiple decoration methods may increase development time and cost.
That does not mean you should avoid creative details. Instead, evaluate whether each detail adds enough value to justify its production requirements.
Discuss construction choices with your manufacturer early. This can help identify practical alternatives without losing the original design direction.
Step 11: Estimate Your Budget and Production Requirements
Before moving into bulk production, estimate the costs associated with developing and manufacturing your garment.
Your total budget may include fabric, trims, sampling, pattern development, decoration, sewing, finishing, labels, packaging, shipping, duties, and other applicable charges.
The final cost depends on factors such as:
- Garment complexity
- Fabric type and weight
- Order quantity
- Number of colors
- Printing or embroidery
- Custom trims and accessories
- Quality requirements
- Packaging specifications
- Shipping method and destination
Request a detailed quotation based on your actual design and production requirements. A low unit price does not necessarily represent the best overall value if quality, communication, or delivery requirements are not met.
Understand Minimum Order Quantity
Minimum order quantity, or MOQ, is the smallest order a manufacturer accepts under its stated terms.
MOQs can vary according to the garment, fabric, color, decoration, and production method. Ask whether the quoted minimum applies per style, color, or another production unit.
For new brands, understanding MOQ early helps prevent budget problems and unnecessary inventory commitments.
Step 12: Find the Right Clothing Manufacturer
If you plan to sell your designs, choosing a suitable manufacturing partner is an important decision.
Look for a manufacturer with relevant product experience, clear communication, suitable sampling capabilities, and quality-control procedures.
Before committing to an order, ask questions such as:
- Can you manufacture this type of garment?
- What fabric options are available?
- What is the MOQ for this design?
- How long will sampling take?
- What information is required to begin development?
- Can you provide custom labels and packaging?
- How are sample changes and approvals handled?
- What quality inspections are performed?
- What are the production and shipping arrangements?
Review the quotation and production terms carefully. Confirm what is included in the price and whether additional charges may apply.
Working With Fashion Soul International
Fashion Soul International is a factory-owned custom clothing manufacturer based in Sialkot, Pakistan. Its published services include private-label, OEM, ODM, white-label, cut-and-sew, and full-package production.
These services can support brands developing custom apparel, from product development and fabric sourcing to sampling, bulk production, quality control, branding, packaging, and international shipping.
The company’s published standard MOQ starts at 100 pieces, although the requirements for a particular order should be confirmed during quotation.
For a custom garment project, prepare your design brief, sketches or reference images, expected quantity, fabric preferences, size range, branding details, and delivery destination. This information helps the manufacturing team assess your requirements and discuss the next steps.
You can visit the official website at Fashion Soul International to explore its manufacturing services.
Common Mistakes to Avoid When Designing a Garment
Even a strong creative concept can encounter problems if important details are overlooked.
Ignoring fabric behavior: A material may look attractive but fail to provide the intended drape, stretch, or comfort. Evaluate the fabric before finalizing the design.
Relying only on digital mockups: A digital design cannot fully demonstrate physical fit, construction, or material performance. Develop a real sample.
Providing incomplete measurements: Missing dimensions can lead to inconsistent results. Include clear measurement points and a suitable size chart.
Adding too many details: Unnecessary features can complicate construction and increase costs. Keep each detail relevant to the design.
Skipping sample approval: Starting bulk production before approving the physical sample increases the risk of receiving garments that do not meet expectations.
Changing specifications without documentation: Keep updated records of fabric, measurements, trims, artwork, and approved changes.
Choosing a manufacturer based only on price: Compare product experience, quality procedures, communication, sampling, and production terms as well as cost.
Avoiding these mistakes makes the design process more organized and reduces preventable production problems.
Frequently Asked Questions
How do beginners learn how to design a garment?
Start by choosing a simple garment, researching its intended customer, and sketching the front and back views. Learn basic fabric terminology, measurements, and garment construction. Then develop a sample, evaluate the fit, and refine the design.
How to design fashion clothes without professional drawing skills?
You can begin with simple sketches, reference images, digital mockups, and written descriptions. Focus on communicating the garment’s shape, colors, materials, measurements, and details clearly. A professional illustrator or product developer can help refine the technical presentation when needed.
What software can I use for fashion design?
You can use illustration and vector design software for sketches and technical drawings. Specialized fashion tools can support pattern development and three-dimensional visualization. Choose software based on your budget, experience, and the complexity of your project.
What is the difference between fashion design and garment manufacturing?
Fashion design focuses on the concept, appearance, fit, materials, and specifications of clothing. Garment manufacturing turns those specifications into physical products through pattern making, cutting, sewing, finishing, and quality control.
Do I need a tech pack to manufacture clothing?
A tech pack is strongly recommended because it records the details needed for consistent production. If you do not have one, you can begin with a clear design brief and references, then work with a product developer or manufacturer to complete the missing specifications.
How many samples are needed before bulk production?
There is no fixed number. A simple design may need fewer revisions than a complex garment with specialized construction or decoration. Approve bulk production only when the sample meets the agreed requirements.
How can I make my garment design unique?
Develop a clear design direction based on your target customer. Experiment with silhouettes, fabrics, colors, proportions, functional features, and original artwork. Use trend research for inspiration while building a consistent identity for your own collection.
Conclusion
Learning how to design a garment requires a balance of creativity, technical knowledge, and practical planning. Start with a clear concept, research your customer, sketch the design, choose suitable fabrics, and define accurate measurements. Then prepare technical specifications, develop a physical sample, and refine the garment before approving production.
Understanding how to design fashion clothes also means thinking about manufacturability from the beginning. Fabric behavior, construction, decoration, MOQ, quality control, and production costs all influence the final result.
Whether you are designing one garment or developing an entire collection, a structured process helps you turn creative ideas into wearable products. With clear specifications and the right manufacturing partner, you can move from an initial concept toward a finished garment that reflects your design goals.